Table of Contents
SAP Query Purpose
SAP Query enables data from multiple tables to be extracted in one report, provided at least one field from one table can be linked to another table
There are two methods of creating query in SAP
- SAP Quick Viewer: Query created by this method is user specific –i.e. the report can be viewed only by the creator
- SAP Query: Query is visible to the users added to the user group
We will now discuss the steps to create SAP Query with each of these methods
SAP QUERY SQVI
Transaction code: SQVI
Create Query in SQVI to get vendor ID with email address. We will use table LFB1, LFA1 and ADR6 table combination to get vendor email, Vendor Number, Vendor name, Company code. Use Left Outer join between LFA1 and ADR6 table to get all vendors with email address.
Steps to create SAP Query SQVI
Go to transaction code: SQVI
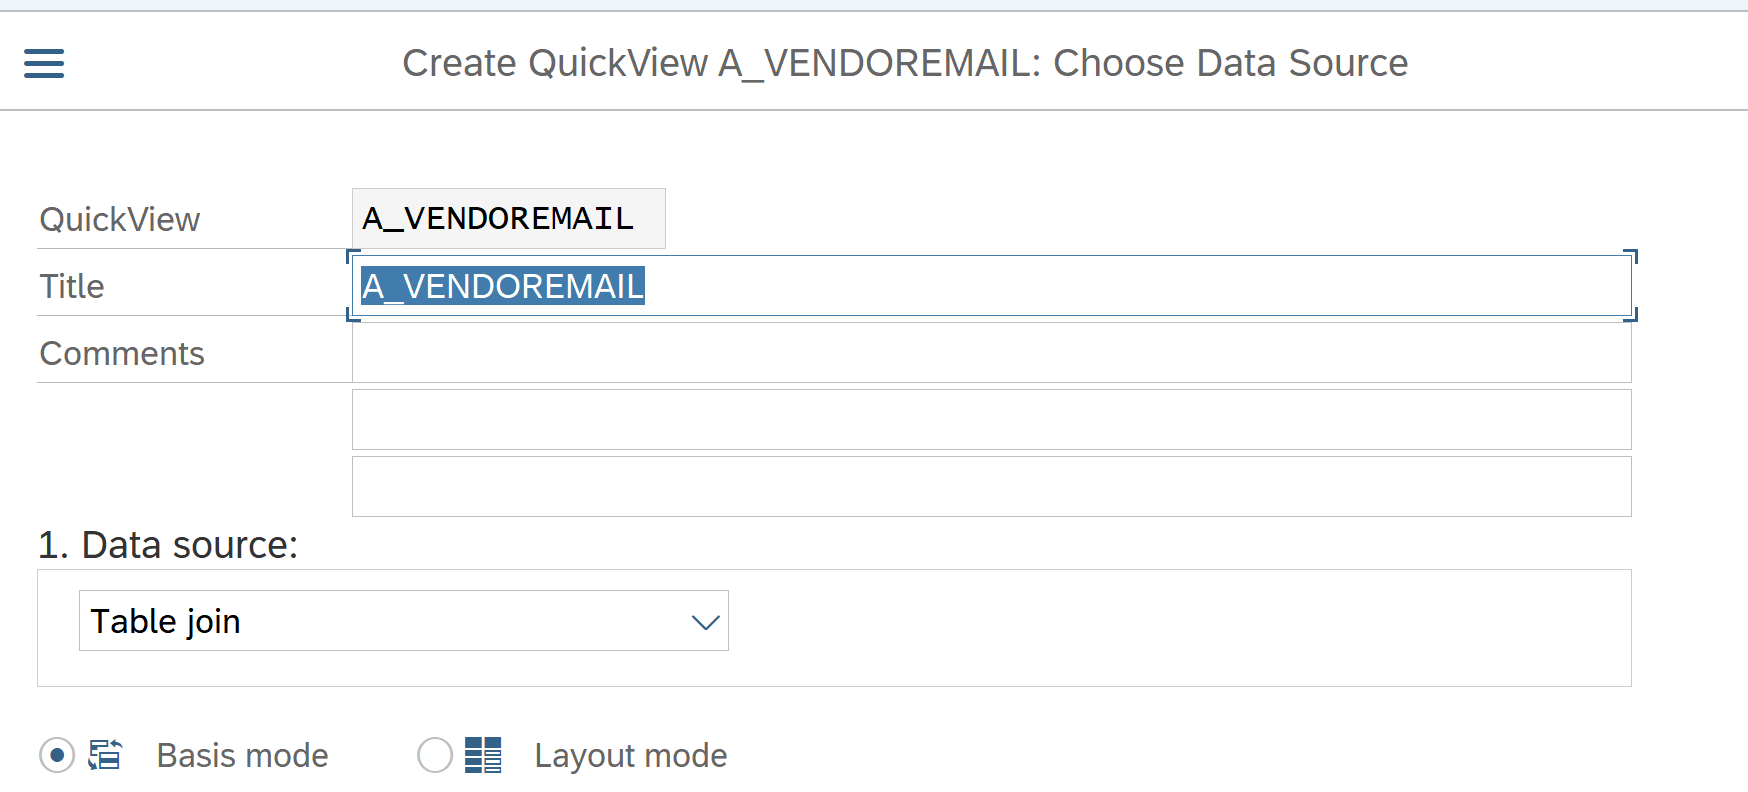
Enter A_VENDOREMAIL as shown below and click create button on the screen

Select data source as Table join
Select basis mode
Once you press enter below screen appears. Click symbol to add table to the below screen
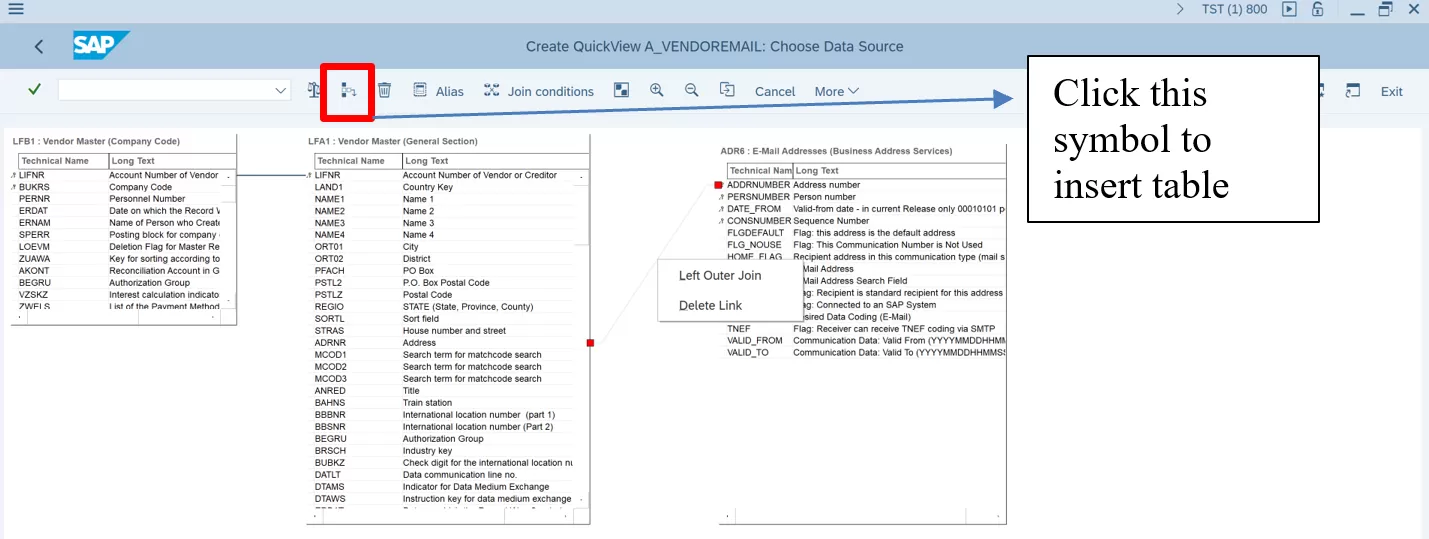
Now go back. Save the SAP Query and select fields for selection screen and fields to displayed in the report as shown below

- List Fields: Fields selected here are displayed in the report
- Selection Fields: Fields selected here appear on the selection screen of the report
Click Execute button to run the SAP SQVI query. Below selection screen will appear
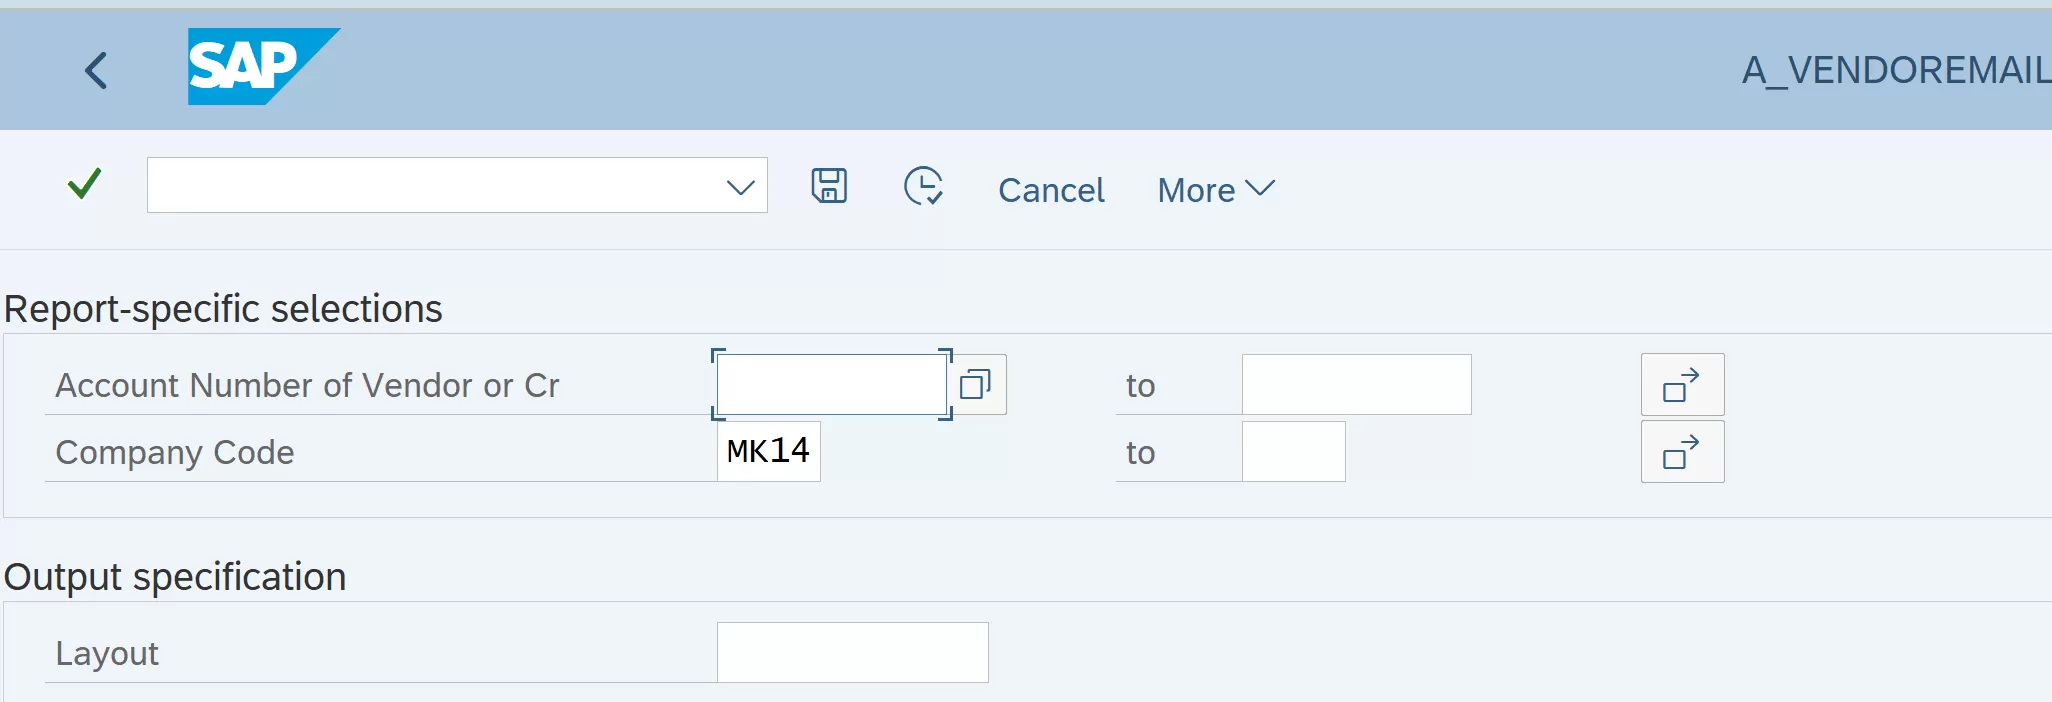
Report / Results

Table Joins in SAP Query
A join combines two tables by using specific criteria. You can choose between inner join and left outer join.
The inner join combines data from both tables if all the specified criteria are met. If one or more criteria are not met, no data records are created in the result set.
The left outer join takes all the values from the left table and combines them with the values from the right table that meet the criteria. All the values from the left table are included in the result table, even if they do not meet the criteria. If the left table returns a table row and the right table returns more than one watching row, then the values of the left table are repeated for every row in the right table.
Second method of creating SAP Query
Below are the steps to create SAP query using Info sets
| s.no. | Steps | Tcode |
| Define User Group | SQ03 | |
| Assign user to User group | SQ03 | |
| Create Info Set | SQ02 | |
| Assign Info Set to User group | SQ02 | |
| Add Field group and Fields to Info Set | SQ02 | |
| Create query using fields in step 5 | SQ01 | |
| Add Tcode to SAP Query | SE43 | |
| Create / Change Area menu for SAP Query | SE43 |
Define User Groups
All Members of a user group have the same rights: All queries for a user group can be edited and/or executed by every member of the group. Member can create queries using the Info Sets that are assigned to the user groups
Go to Transaction Code : SQ03
Ensure that you are in the correct SAP Query area by navigating to Environment à Query
Areas- Standard Area
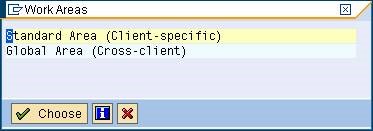
Select the “Standard Area (Client-specific).
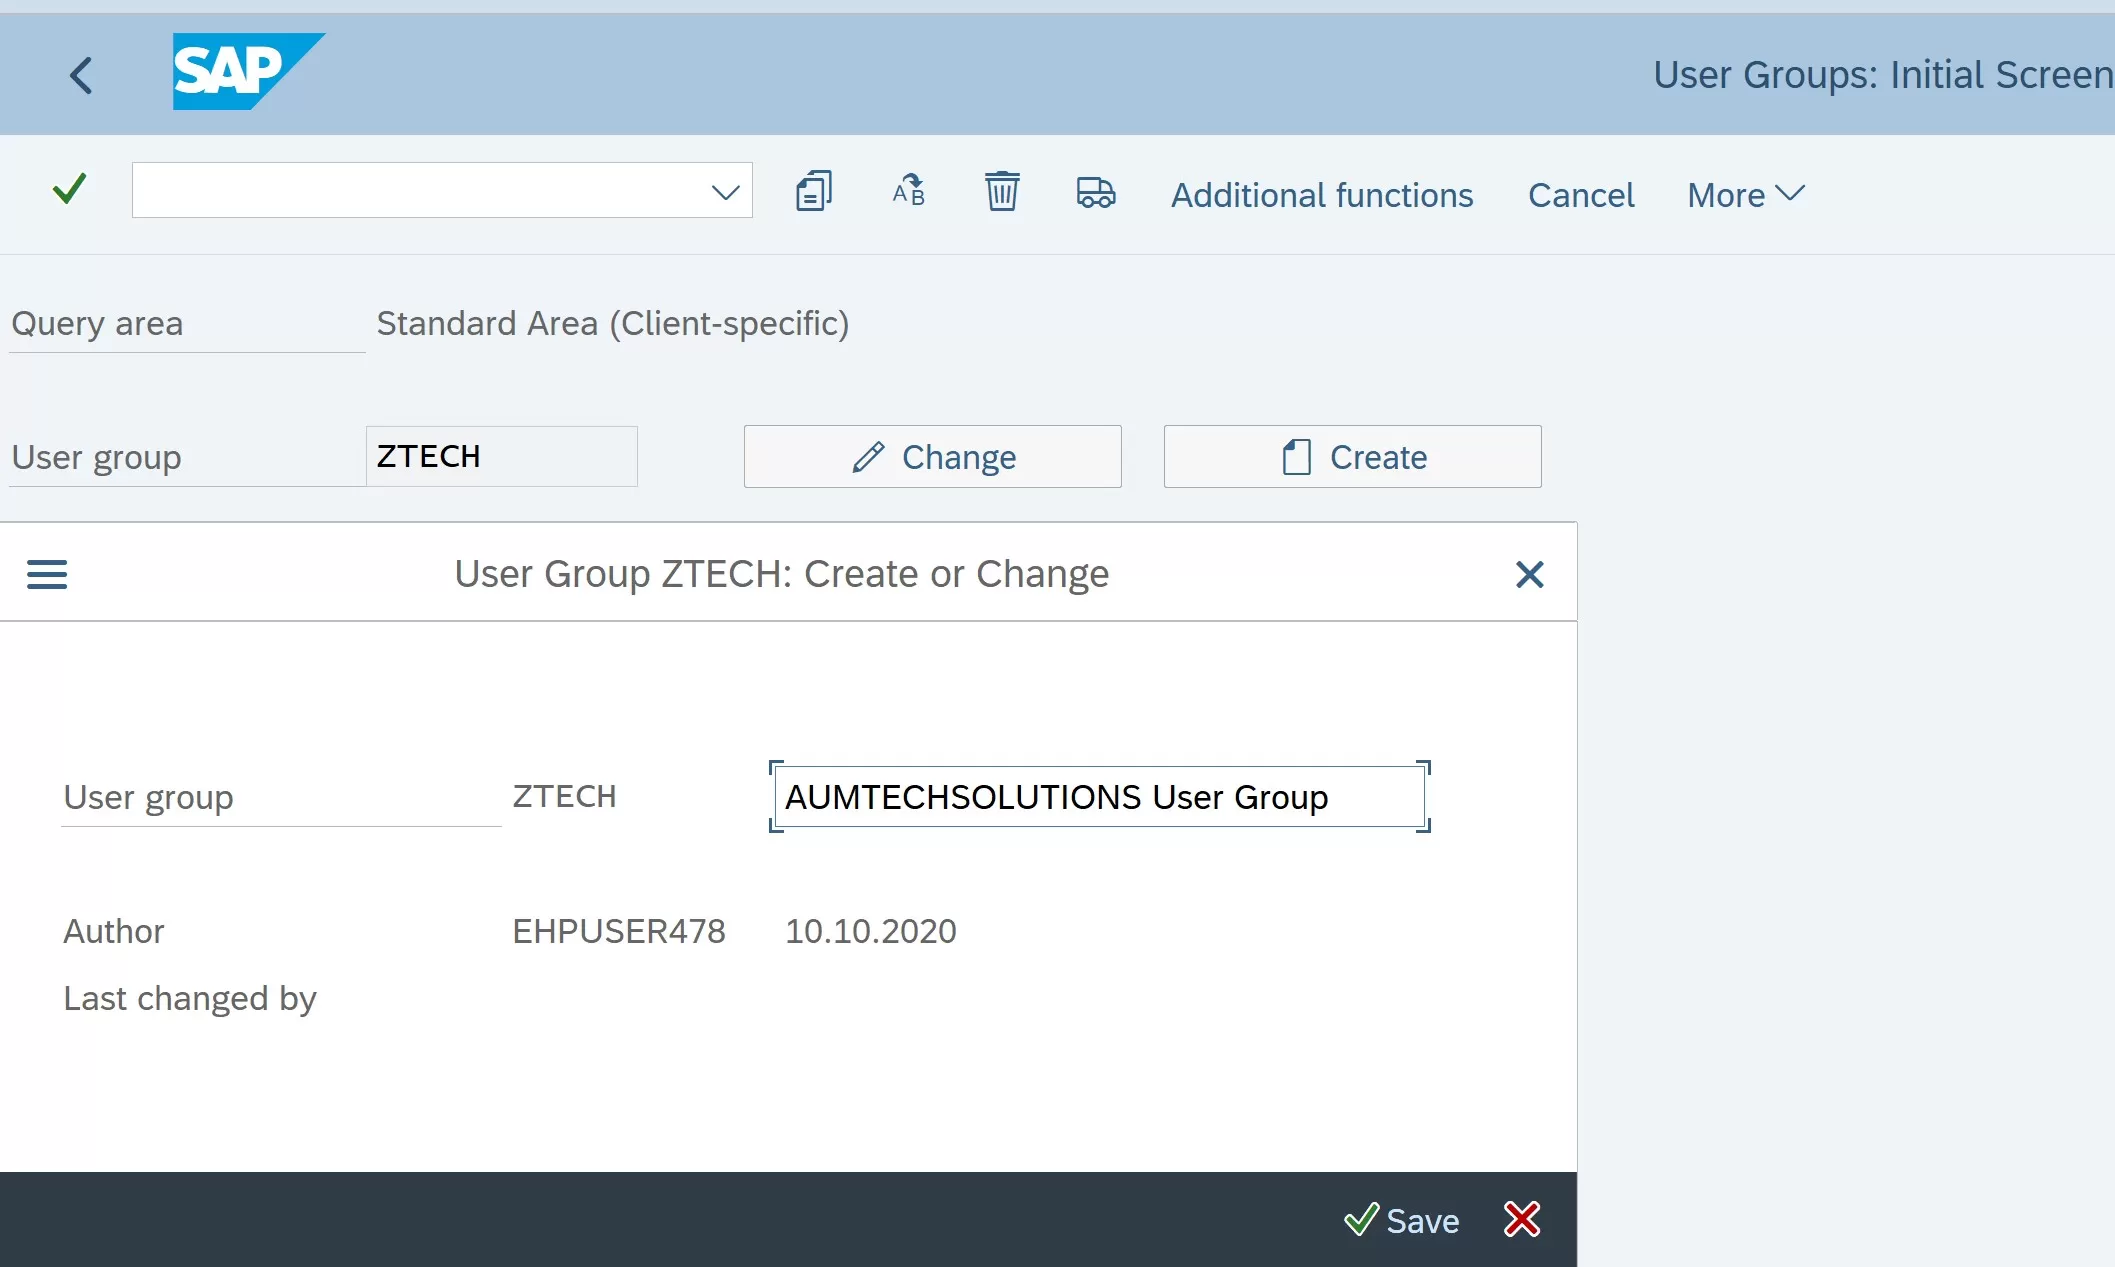
Now in the main screen, enter the name of the Query Group in the User Group field and click on CREATE
Enter user group name ZTECH, enter description and click create button
Assign Users to user Group
Tcode : SQ03
- Click on the “Assign Users and Infosets” button
- Enter the SAP User-Ids of all the users you wish to include in the test group.


Create Infosets in SAP
Go to transaction SQ02
Enter the name of the InfoSet you wish to create and click on CREATE.
Select the option ‘Table join using basis table’ and enter ‘BKPF’. This means that source table used is BKPF
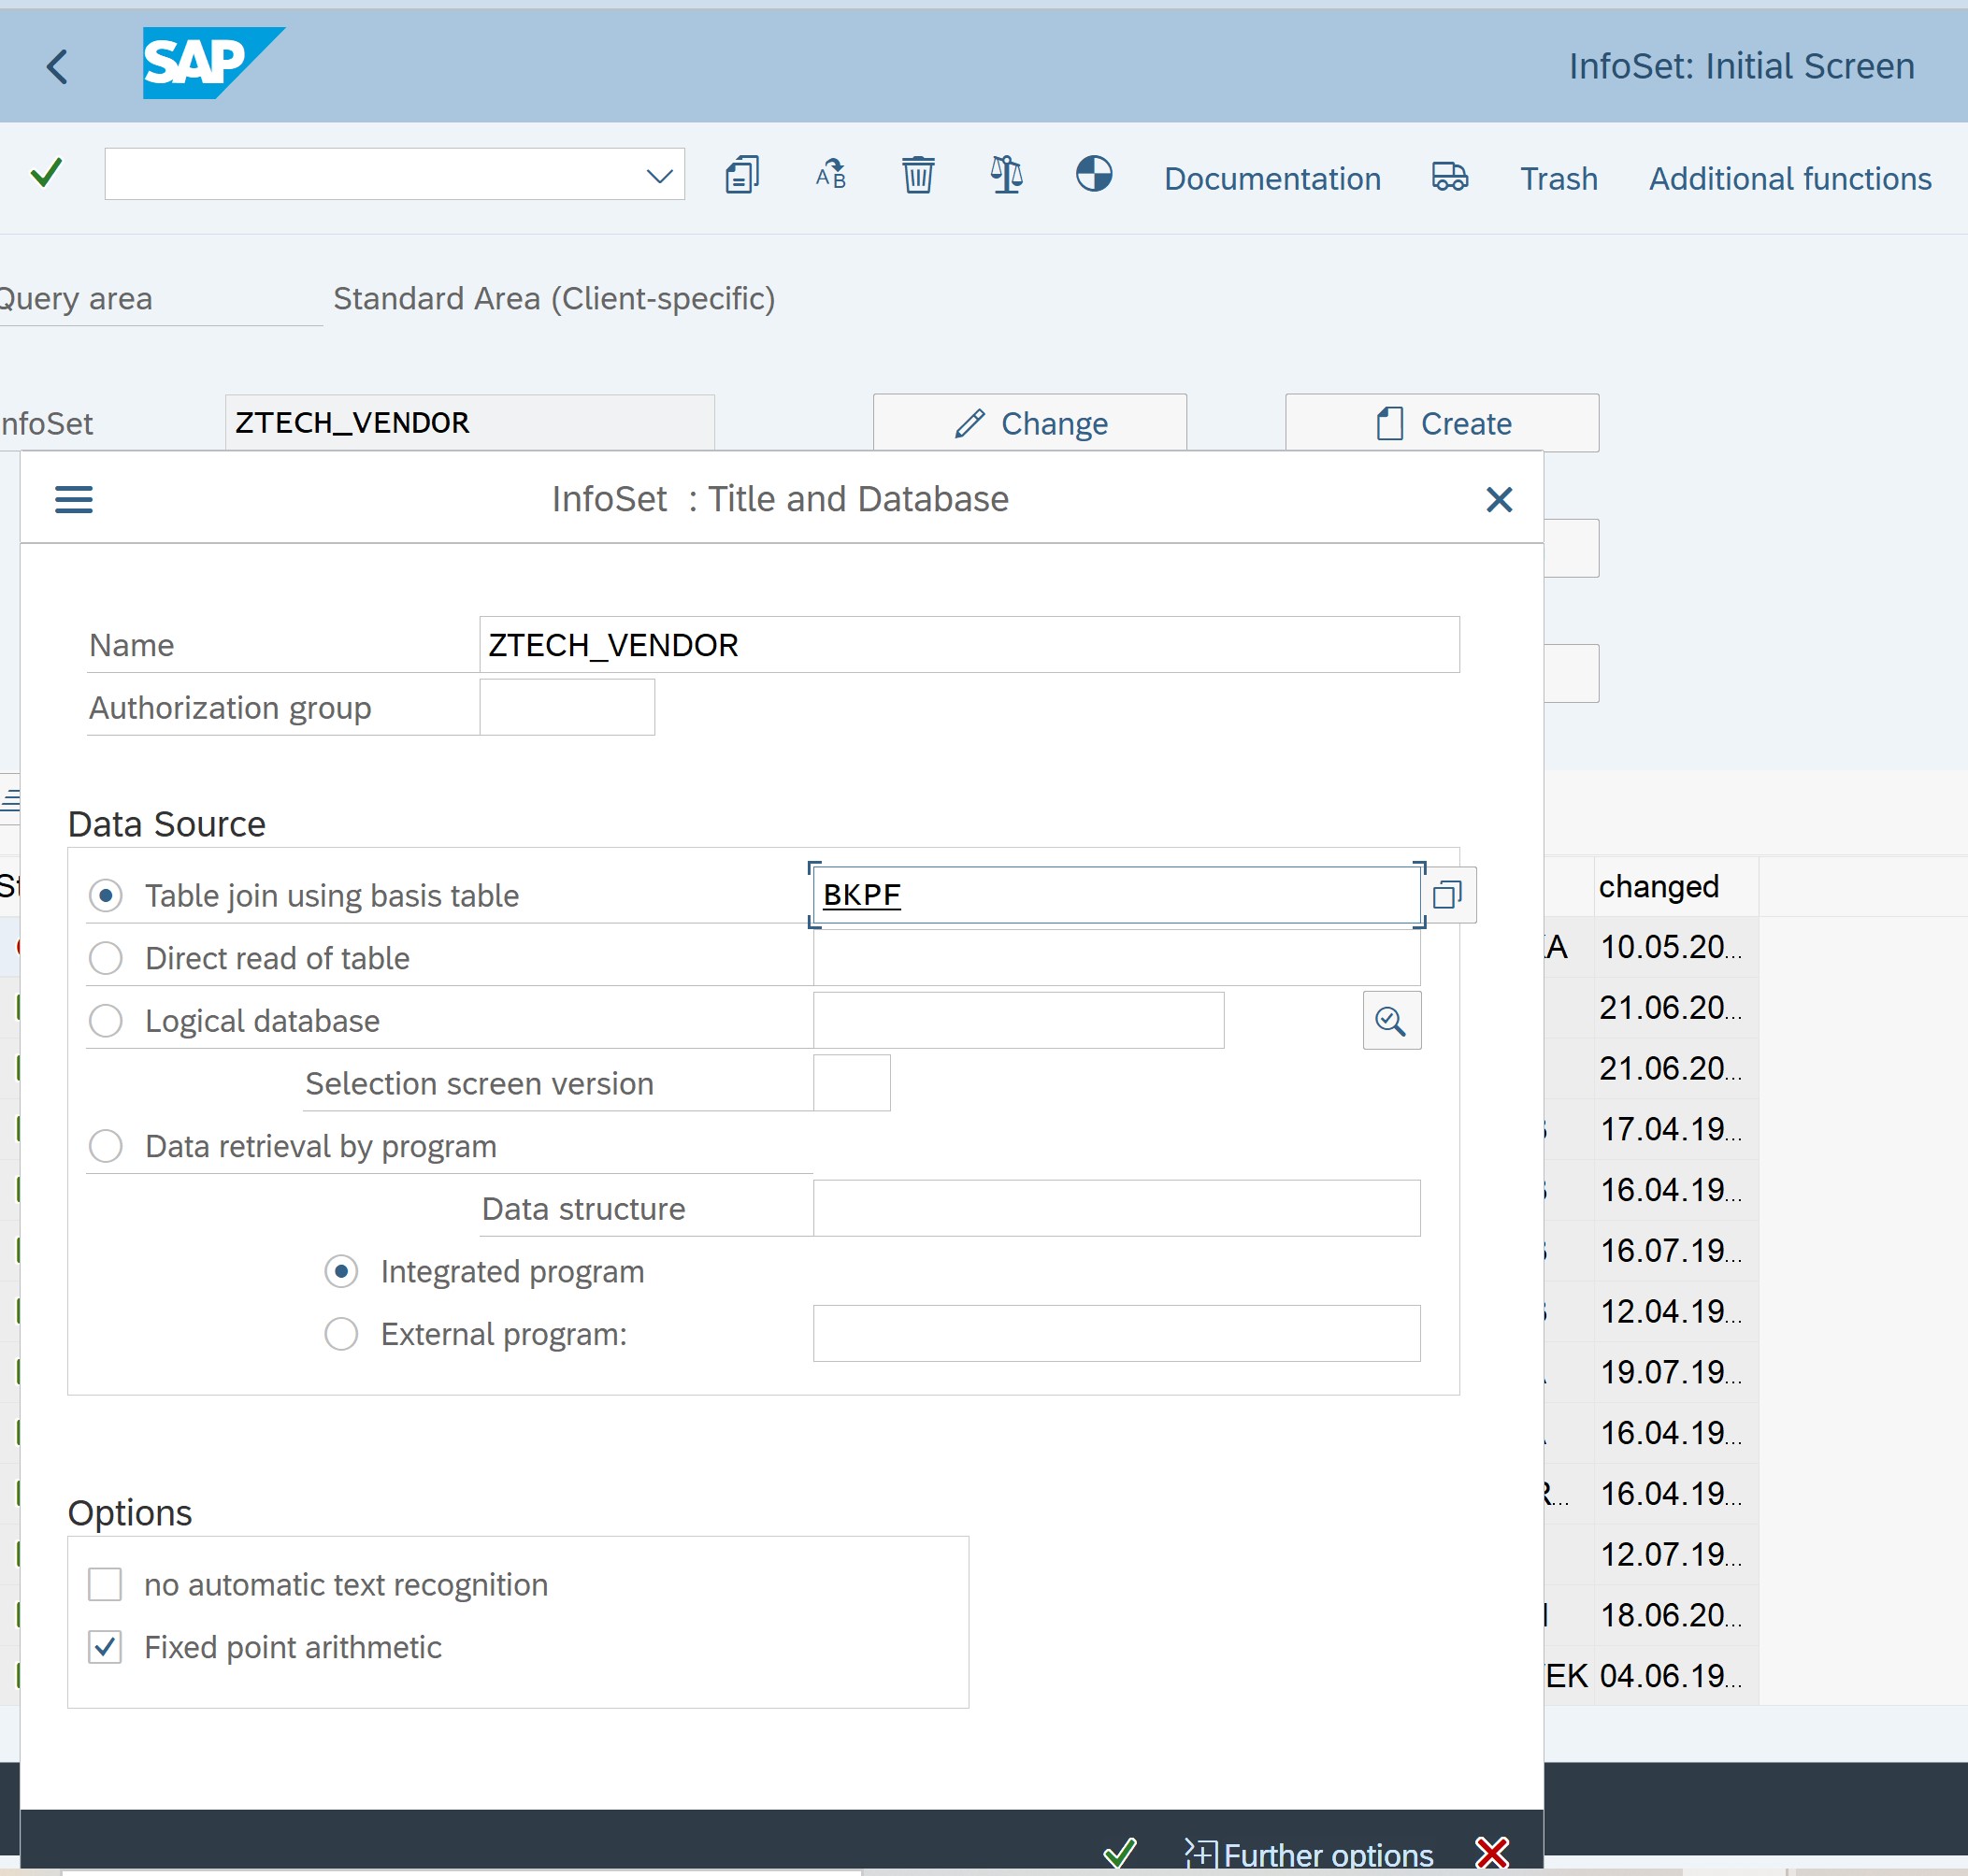
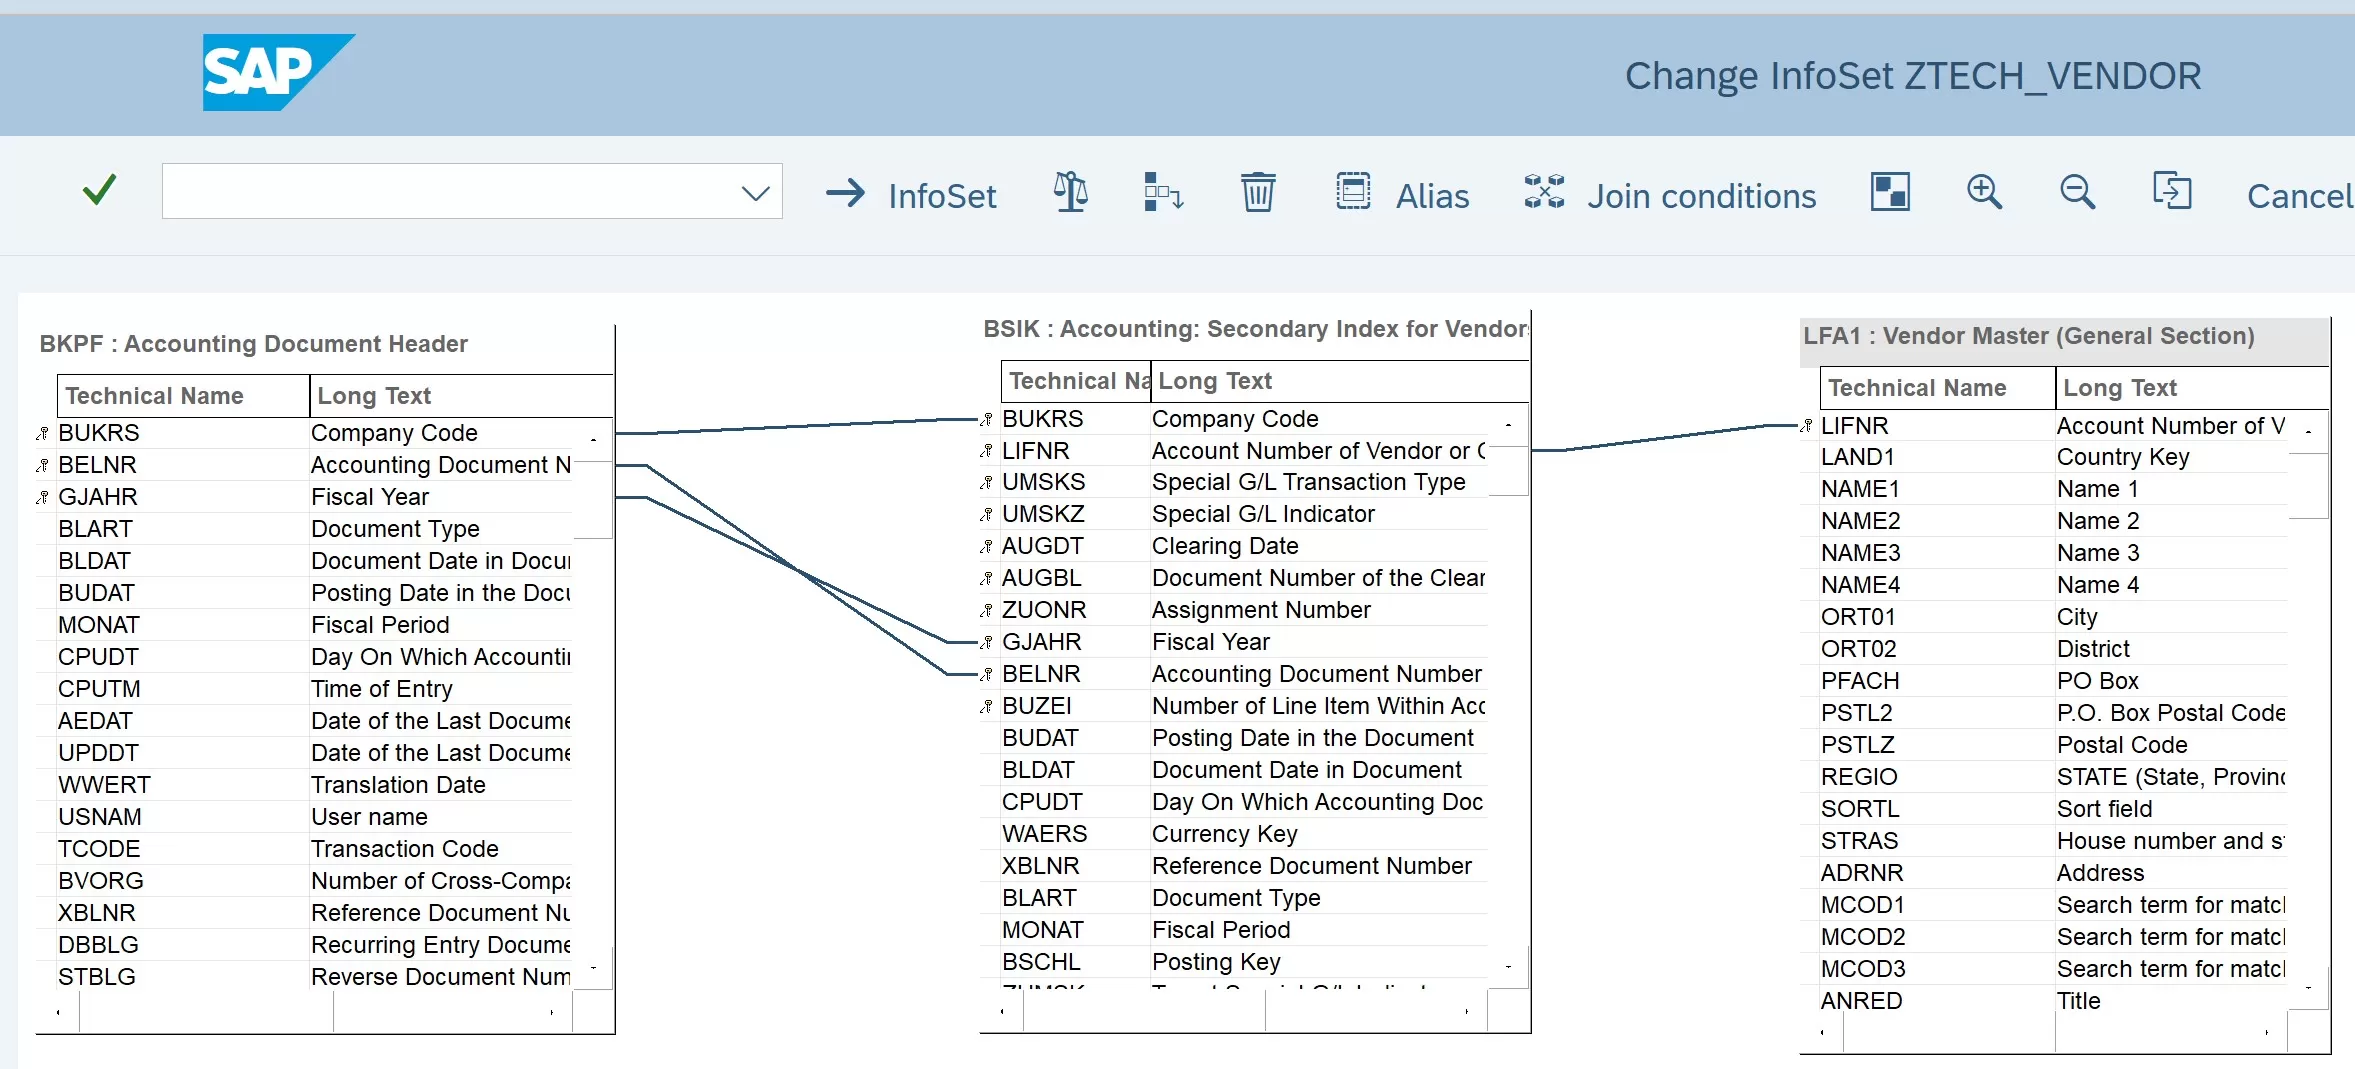
Click symbol to add table BSIK and LFA1. You can add other tables based on your query requirements
Expand the tree on the left-hand side to view the fields in each table. As seen on the screen, the left side of the screen shows the tables and the fields. The right side displays the field groups. Now we need to assign fields to the field groups. These field groups will display in the SAP Query tool during reporting. Select the field group on the right side and then drag and drop the fields from the left side to this field group as show below
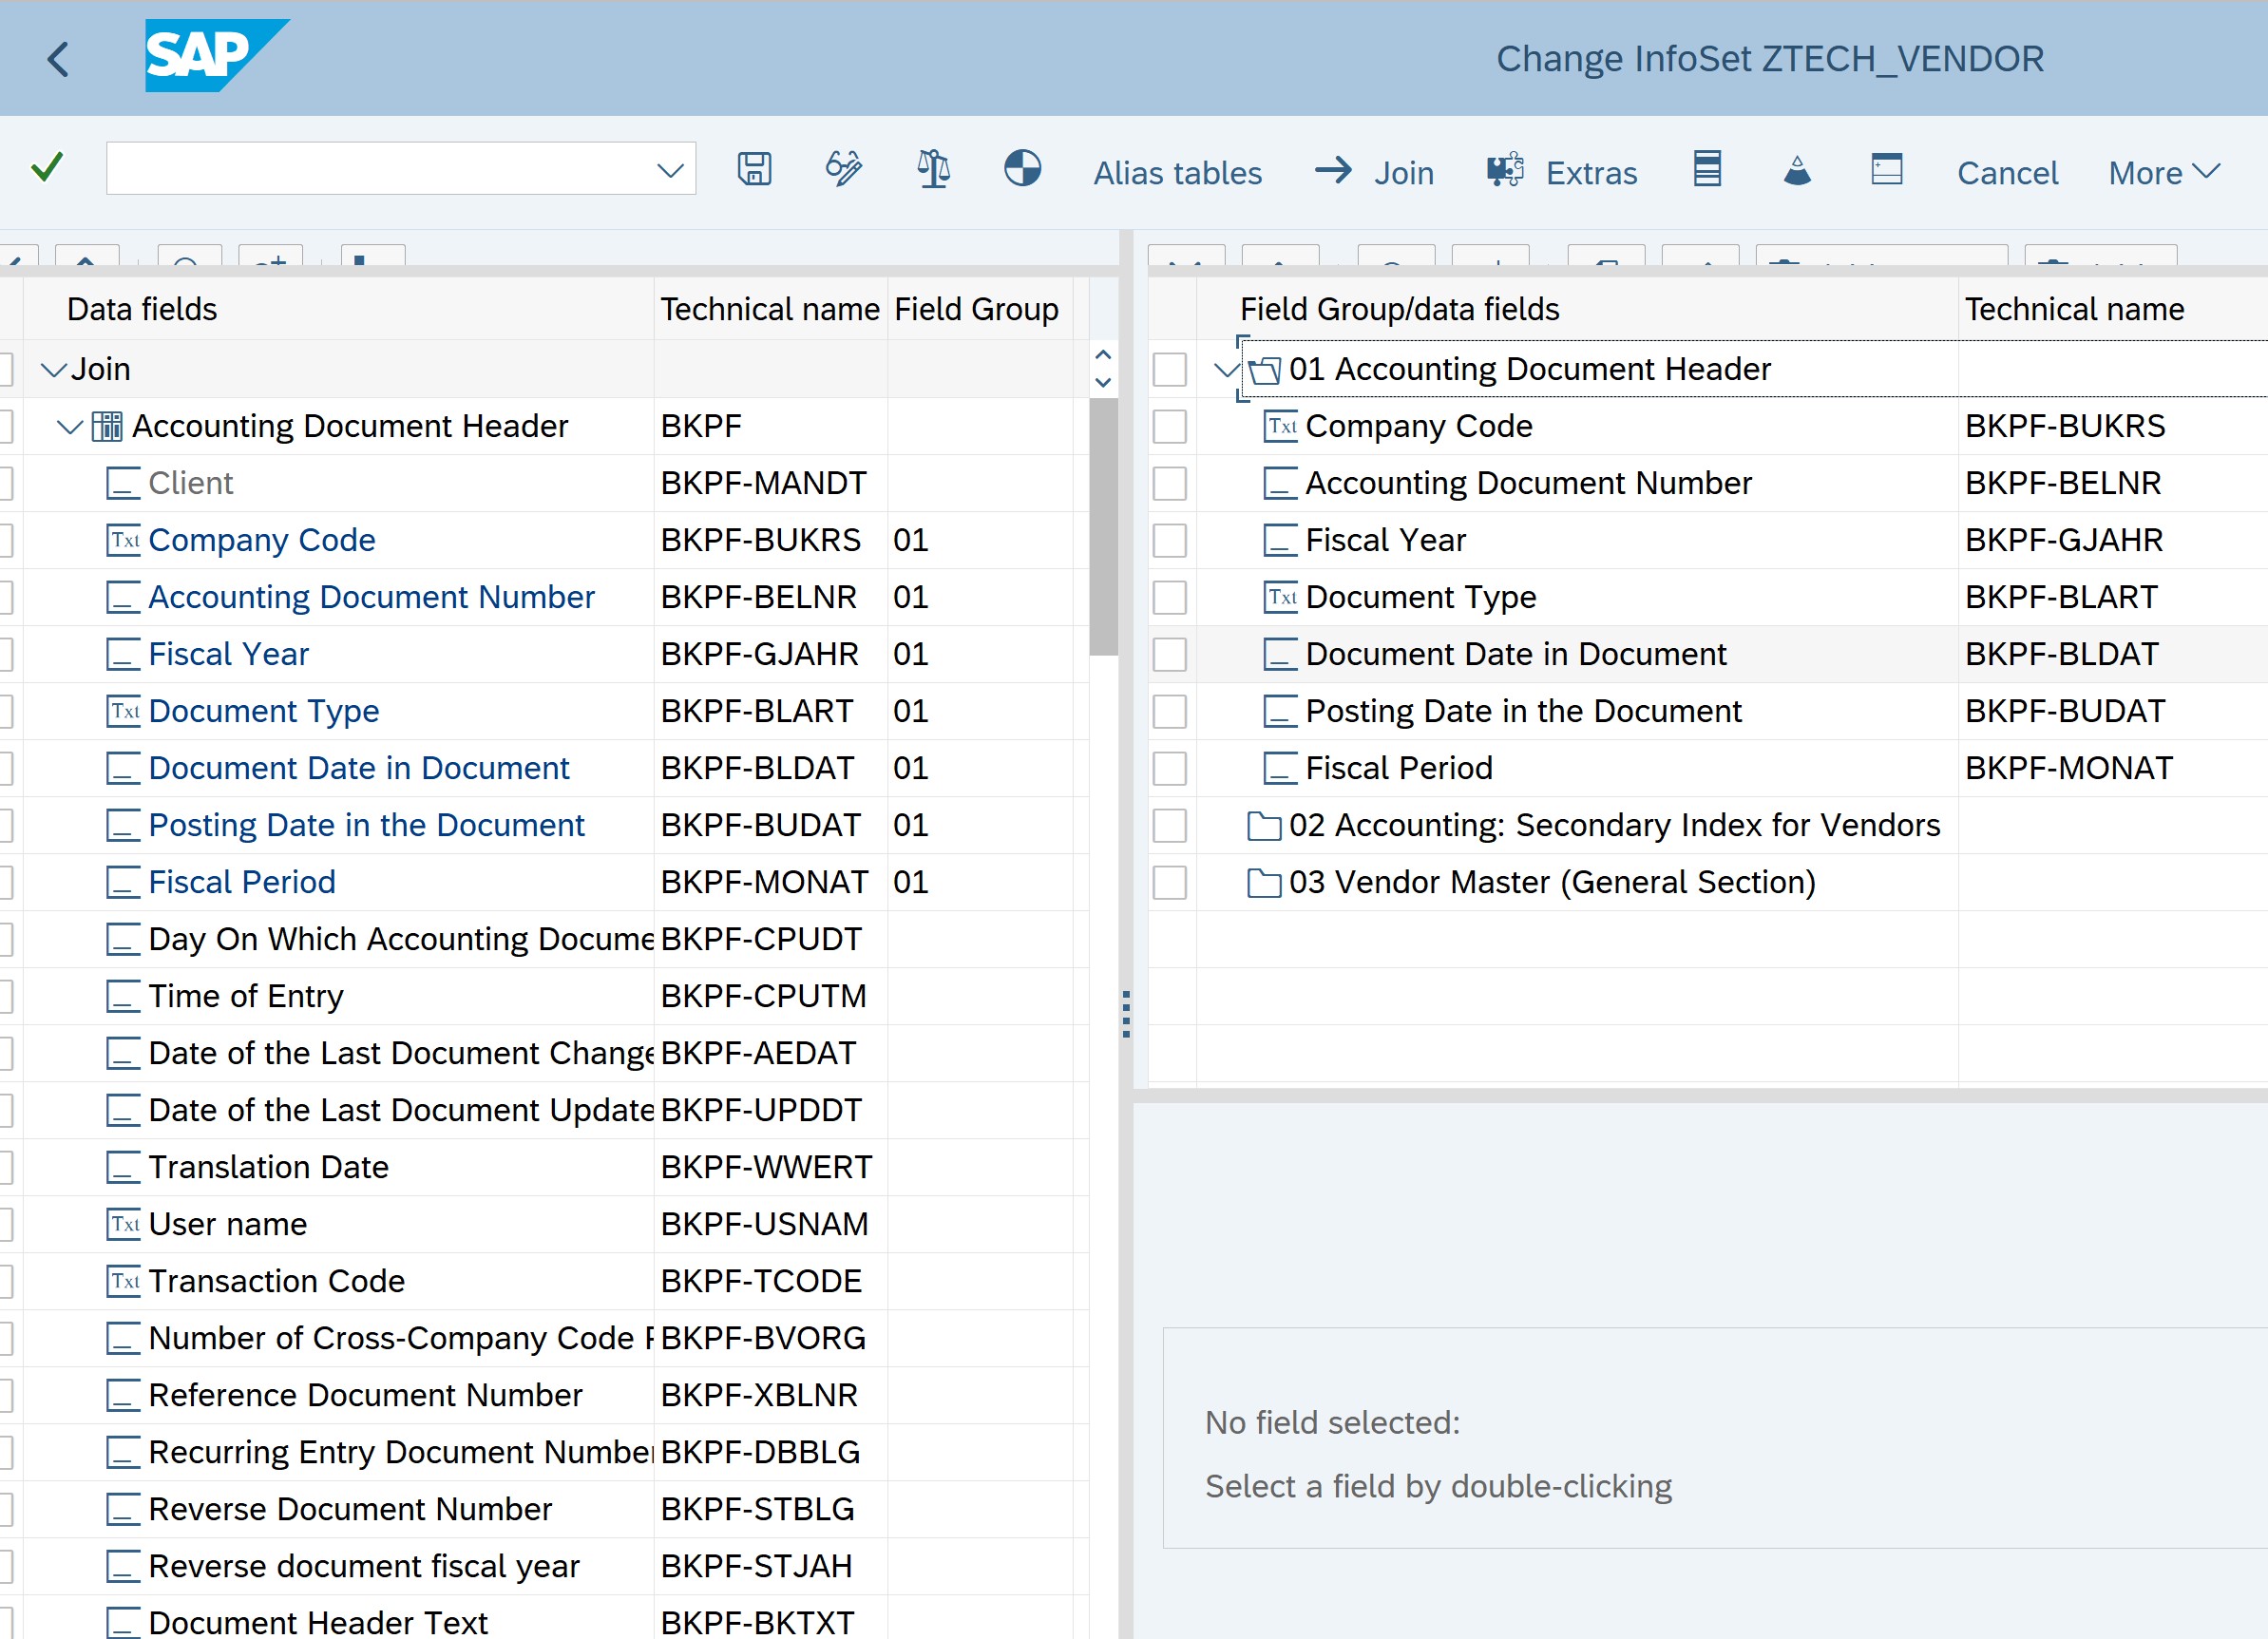
Click on SAVE. Now generate the InfoSet by clicking on GENERATE.
Assign InfoSet to User Group
Go to transaction SQ02
Enter the InfoSet name created above and click on “User Group Assignment” button.
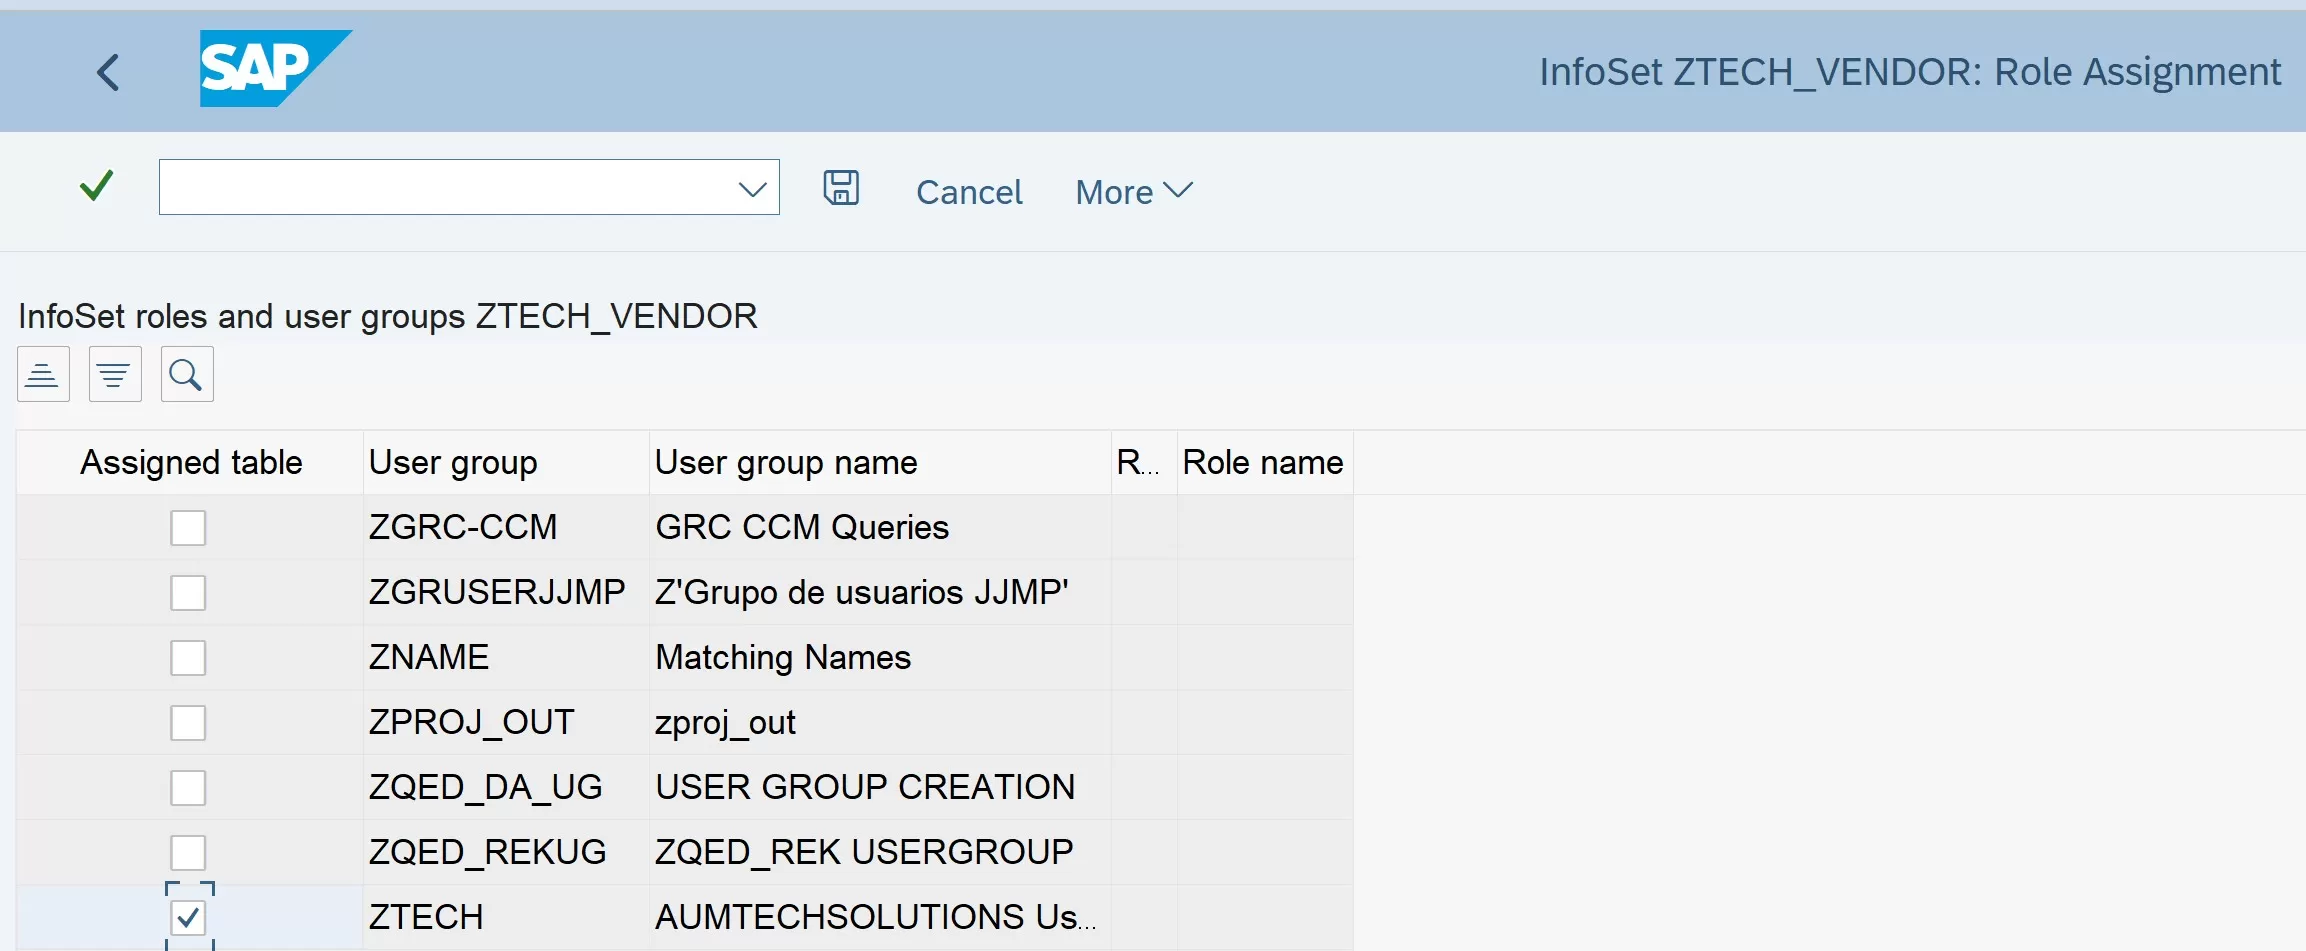
Create SAP QUERY
Transaction code: SQ01
Enter SAP query name say ZTECH_VENDOR and click on ‘Create’ button
Select the InfoSet created in earlier steps, i.e. ZTECH_VENDOR as shown below
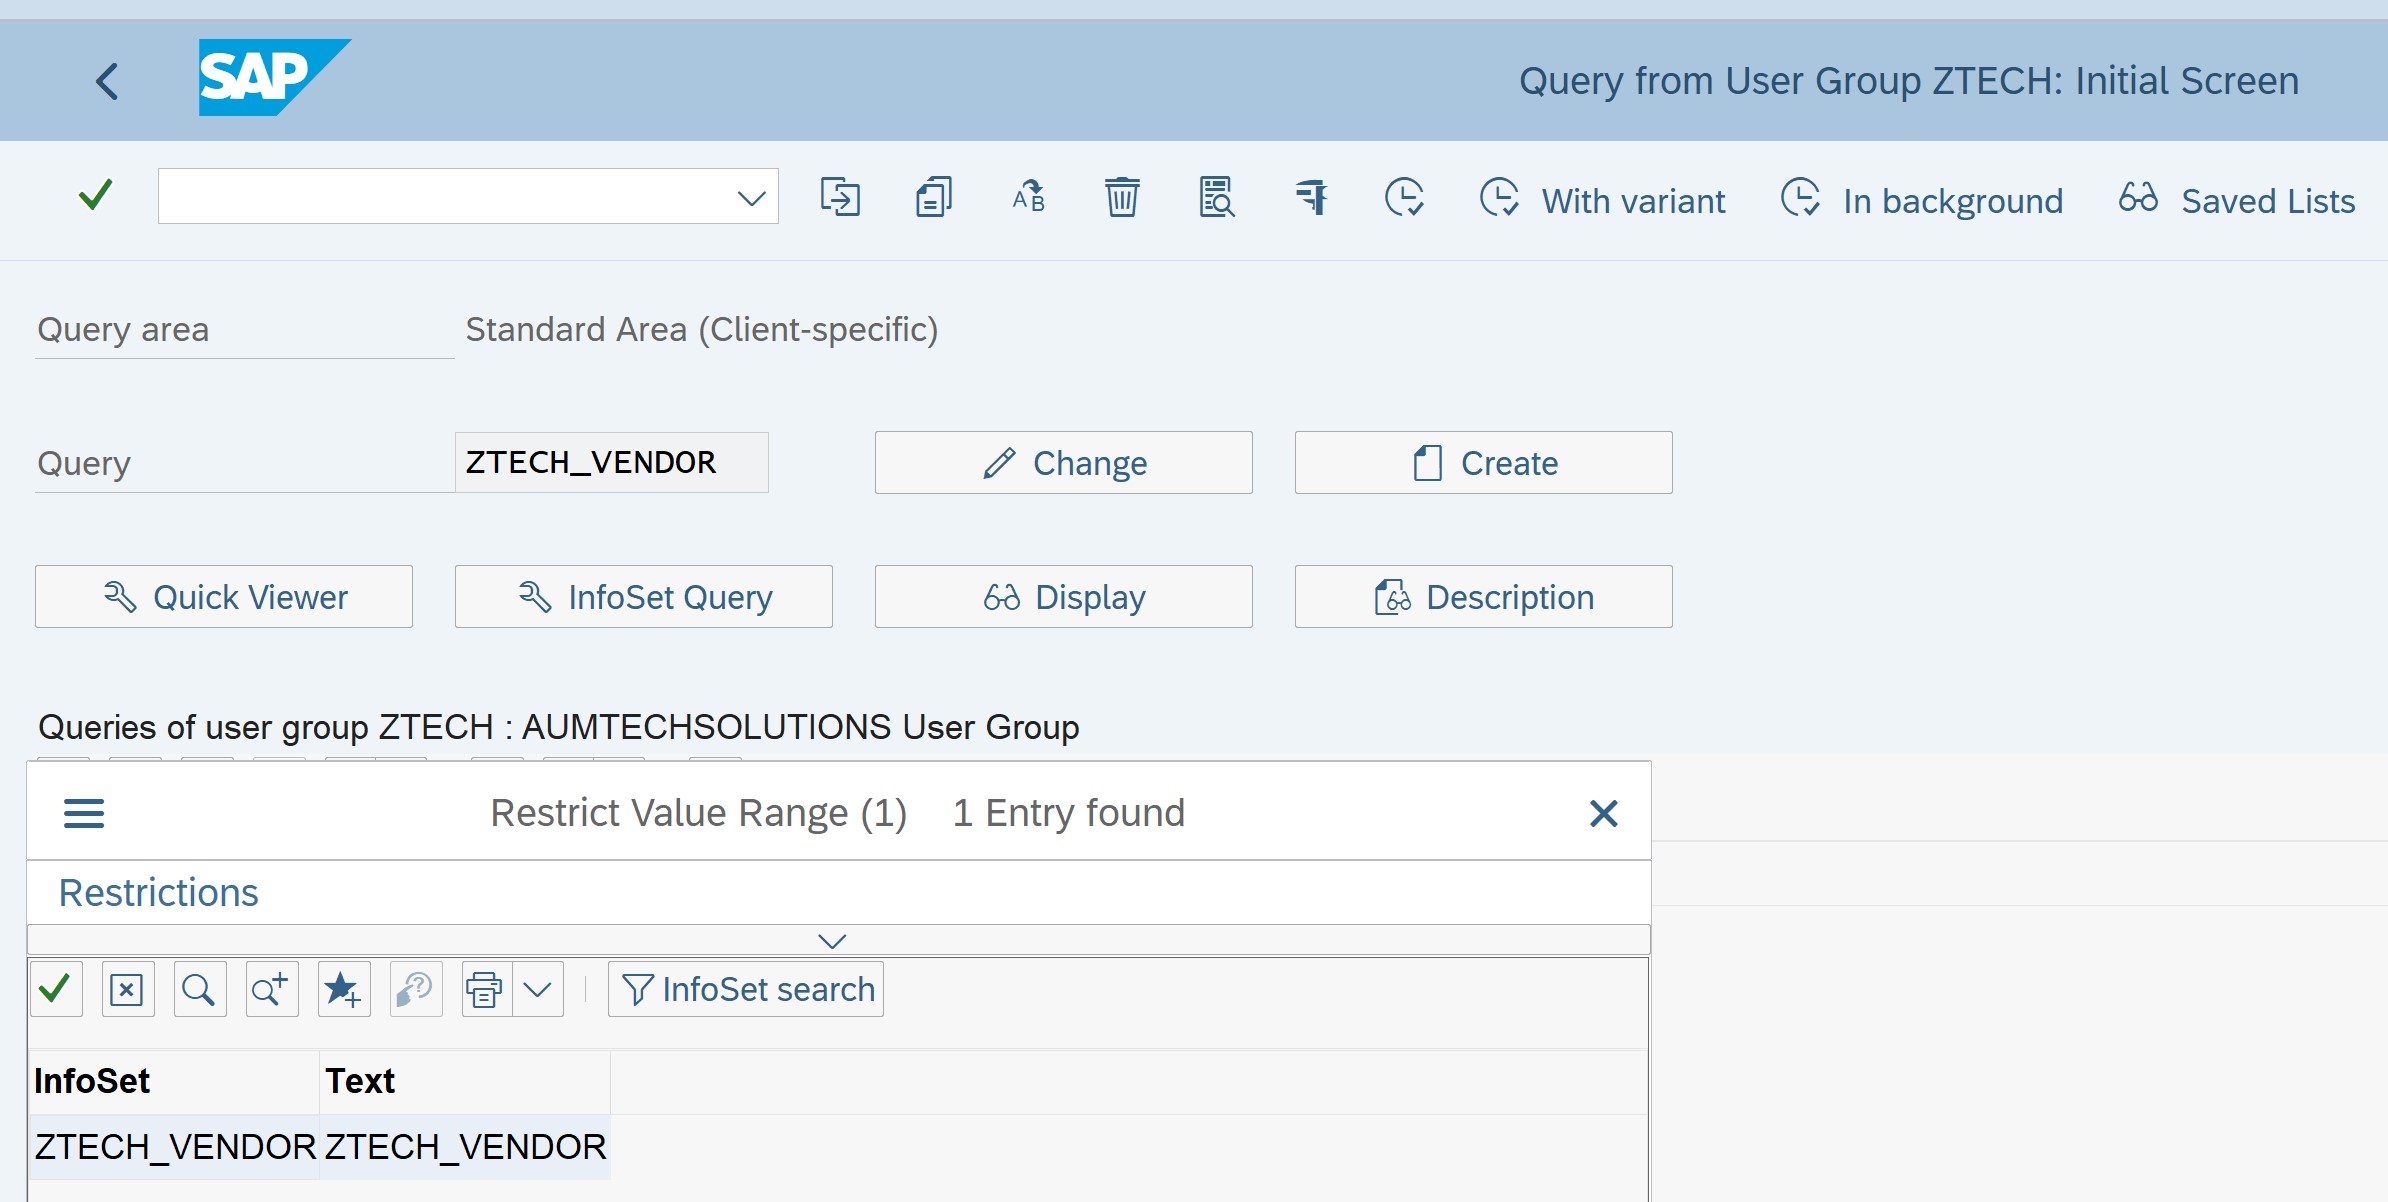
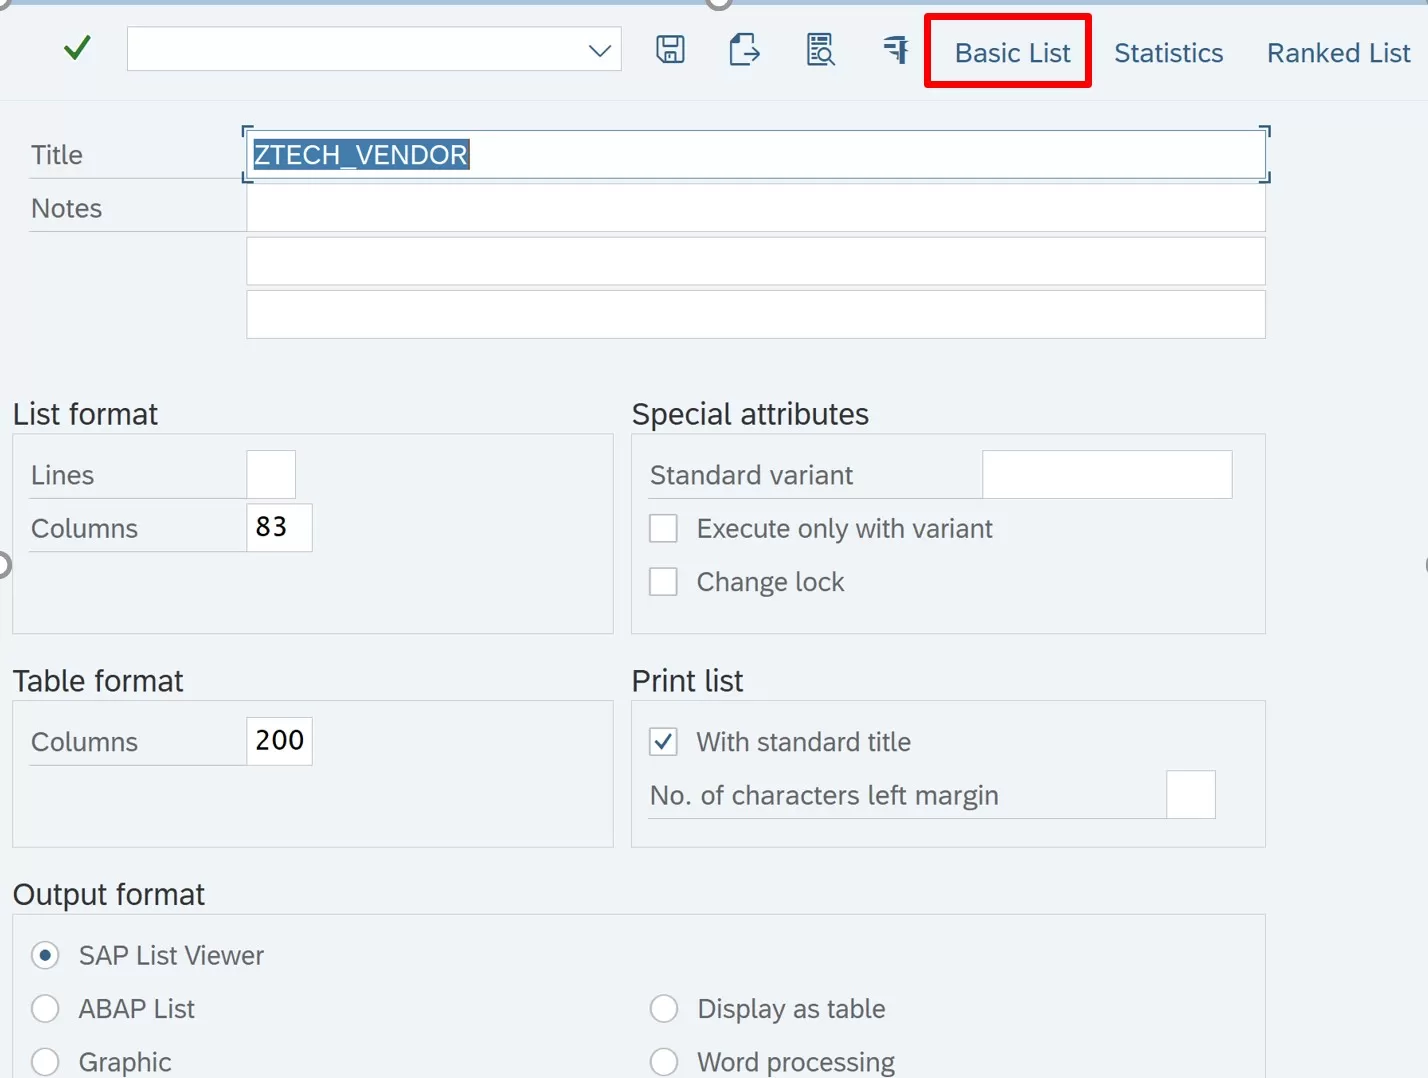
In the below screen, give name of the SAP query report. Press save and then select Basic list button as shown in image below
Similar to SAP query created in SQVI earlier select the list and report selection fields in the screen as shown below
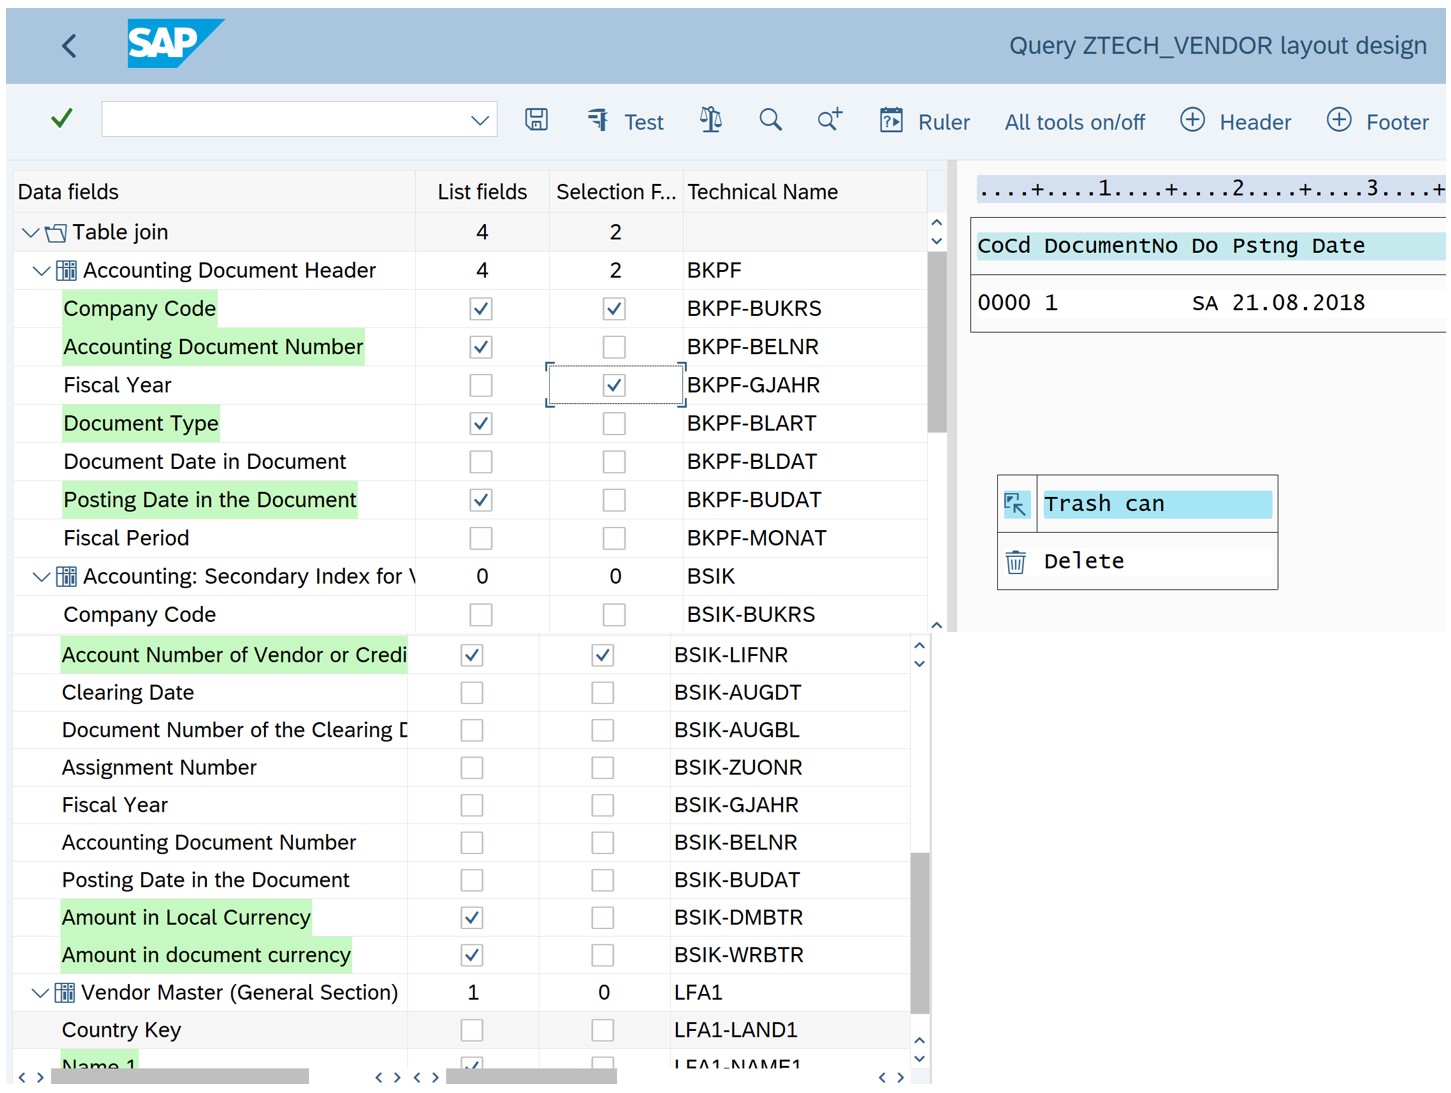
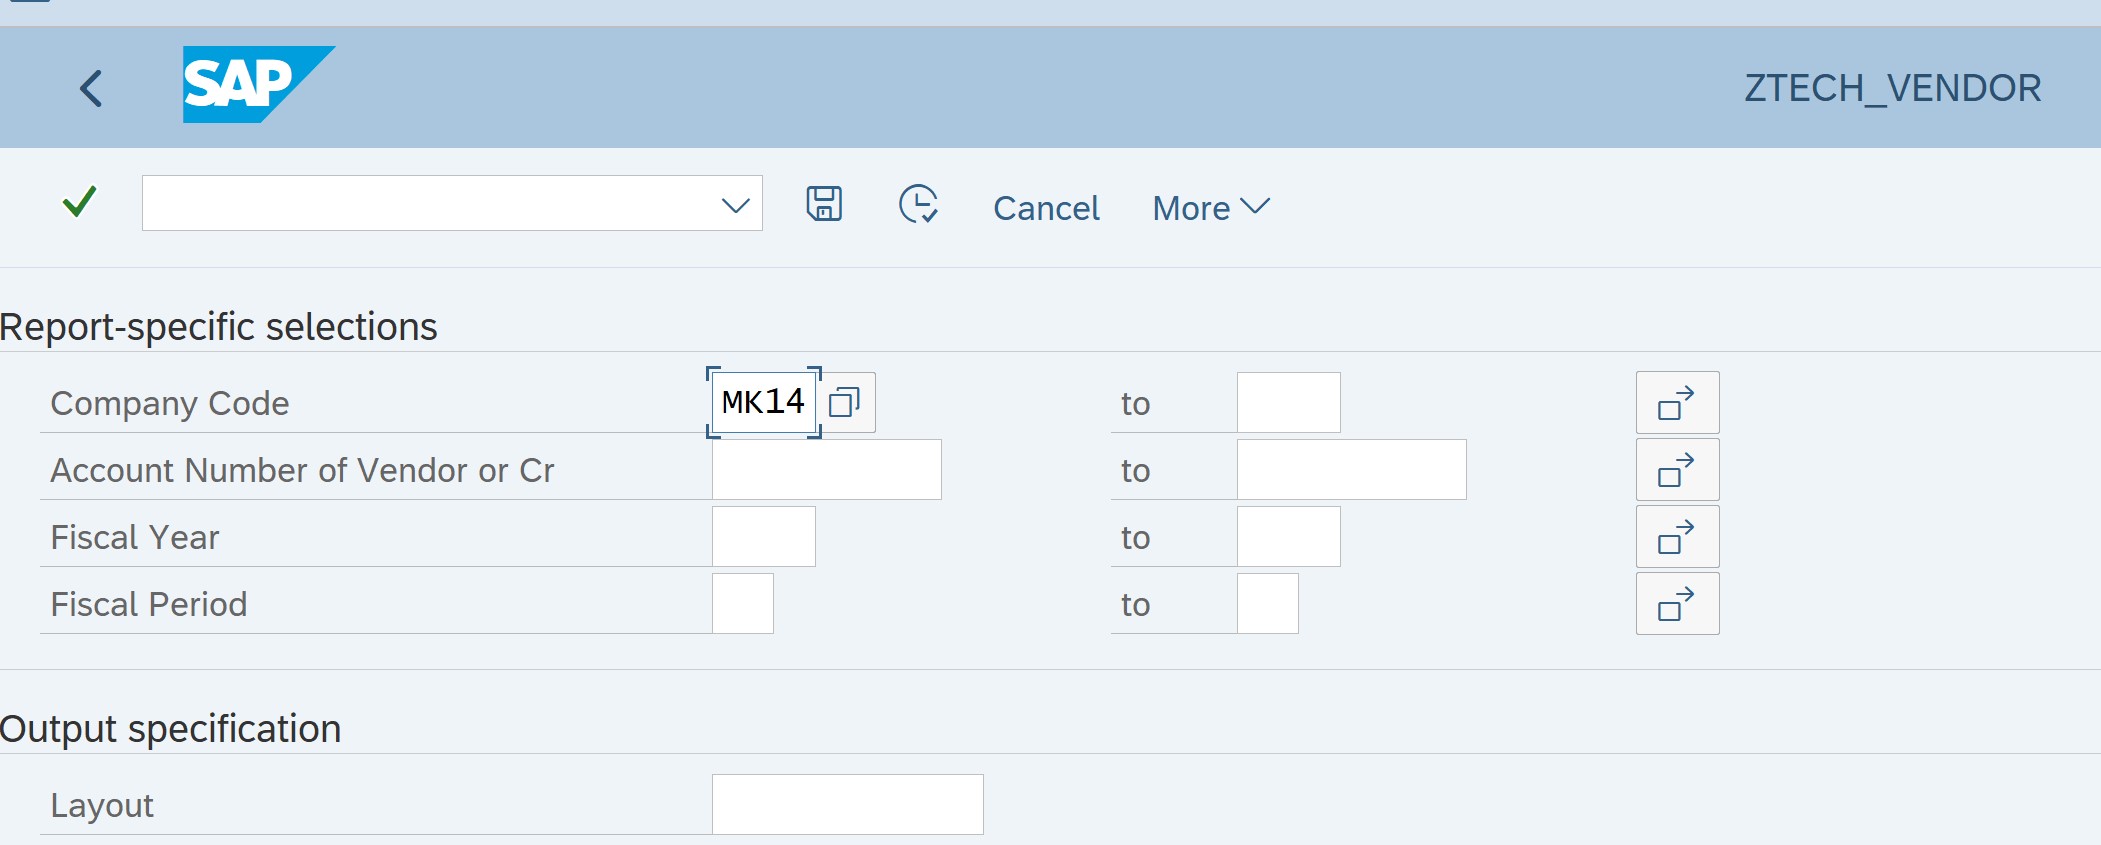
Now click the execute button. Report selection screen will appear as below. Enter the data and execute the report
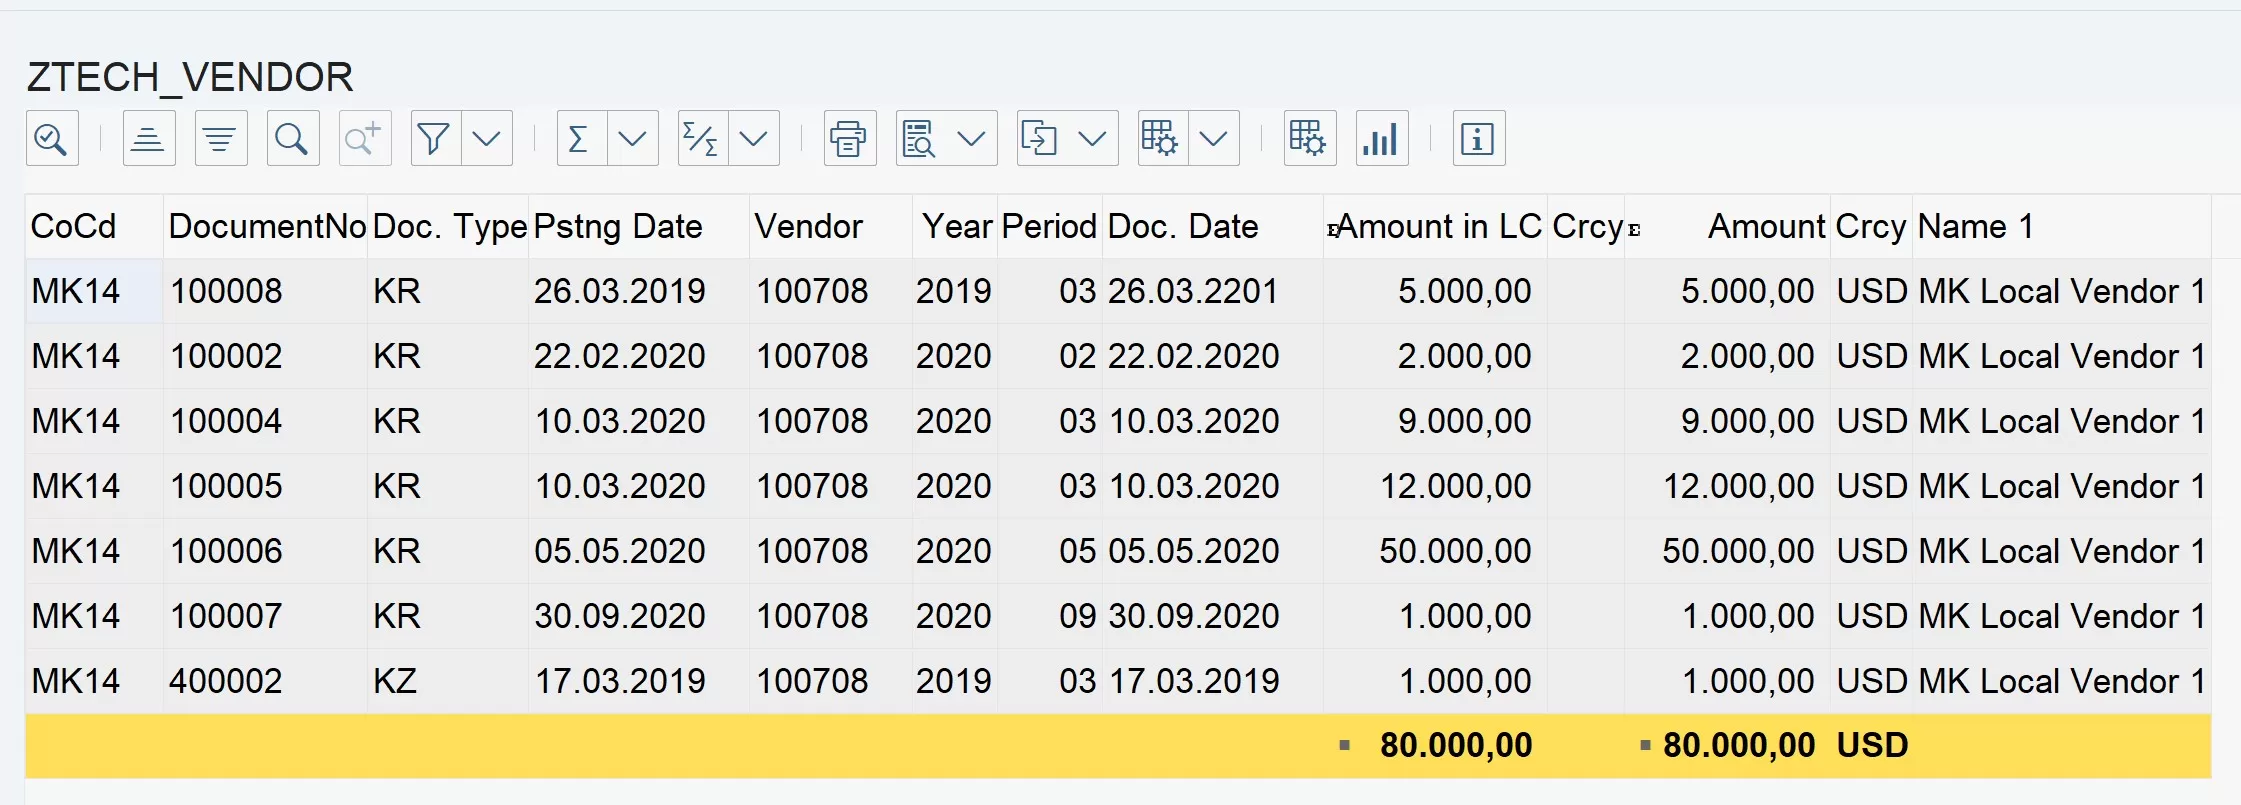
SAP Query Report ZTECH_VENDOR displayed as below
Transport Query in SAP
Go to transaction code: SQ02
Menu: Environment => Transports (Report: ZTECH_VENDOR)
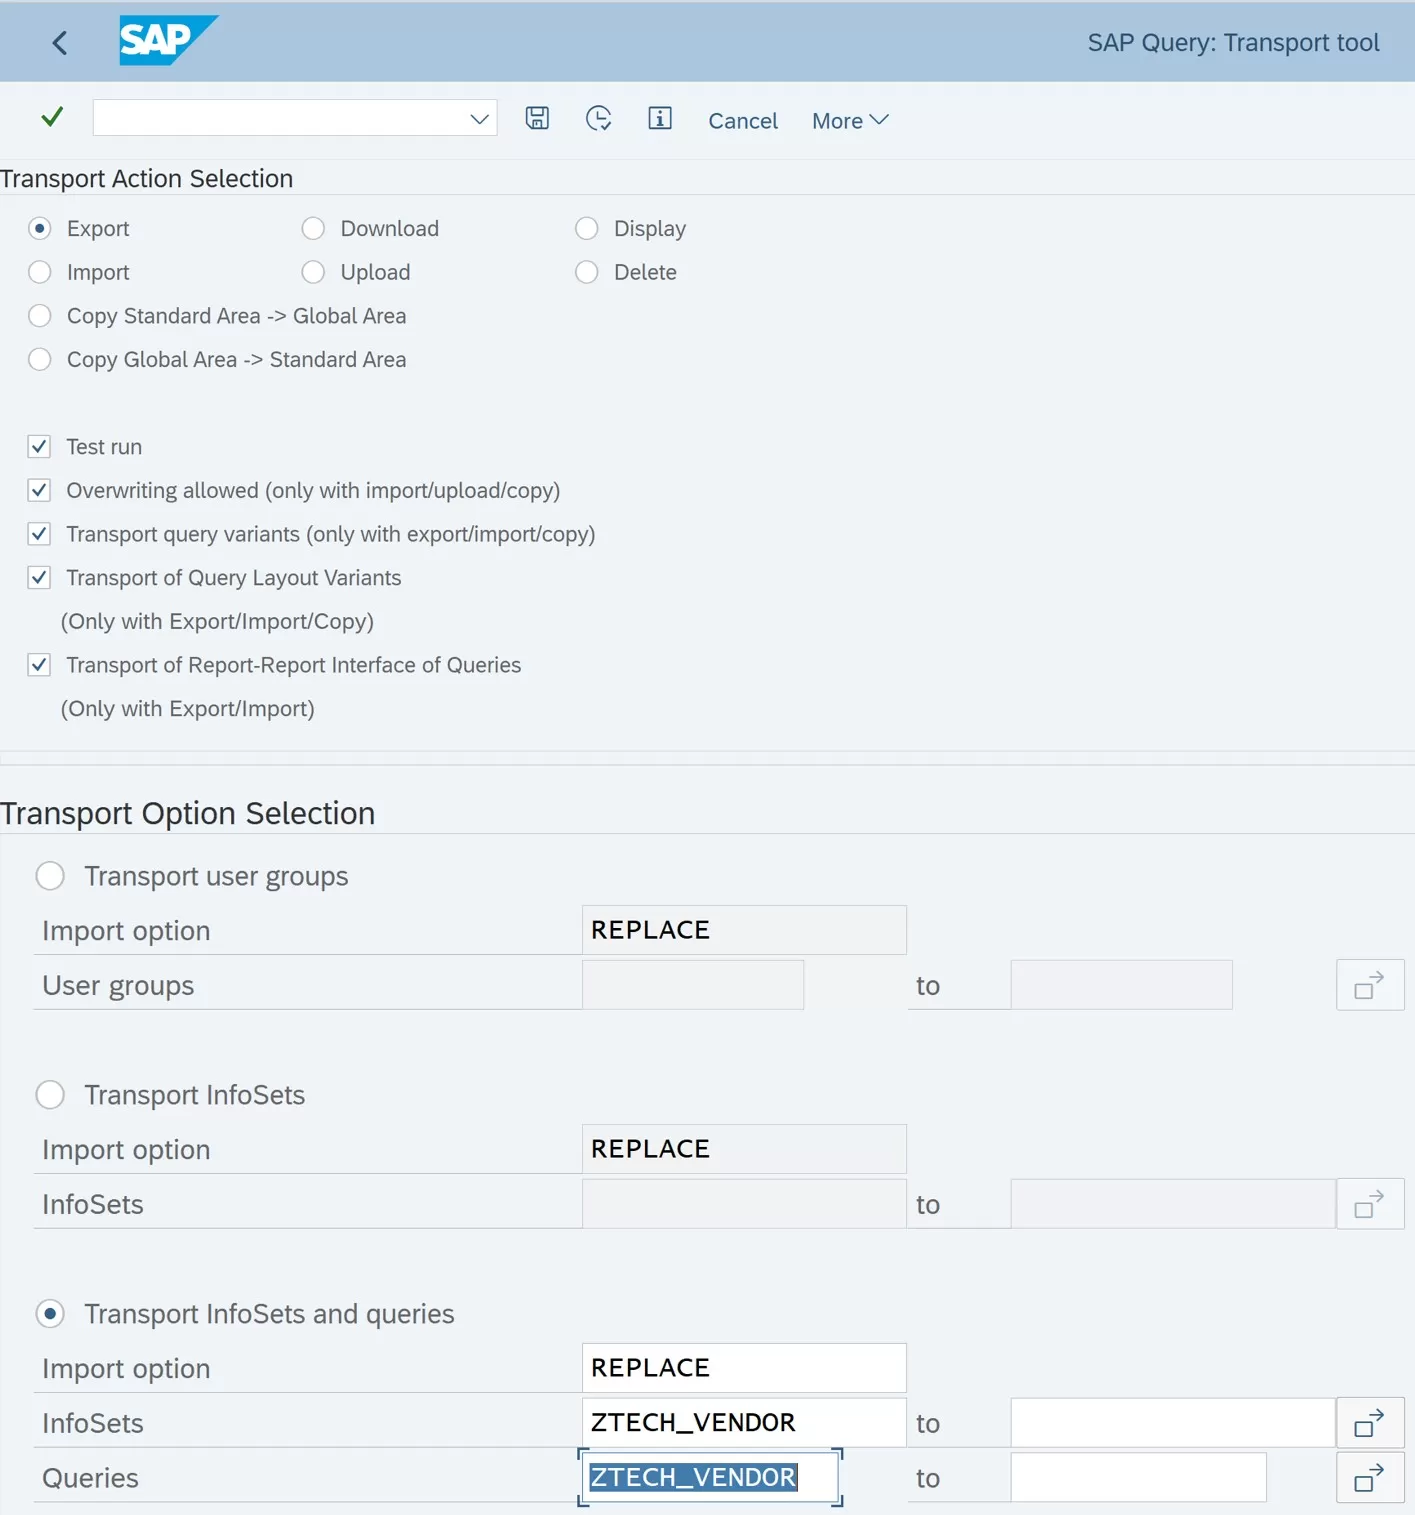
Then, once the above transport request is released and transported follow the same procedure in the target client, but now this time with import radio button selected. Remember to enter the transport request number in the dataset field, at the very bottom of the screen. Also select the Transport InfoSet and queries radio button under transport option selection.
Create Tcode for SAP Query
Go to transaction code SE93
Give Tcode as ZTECH_VEND

Click create button and select transaction with parameter as shown below
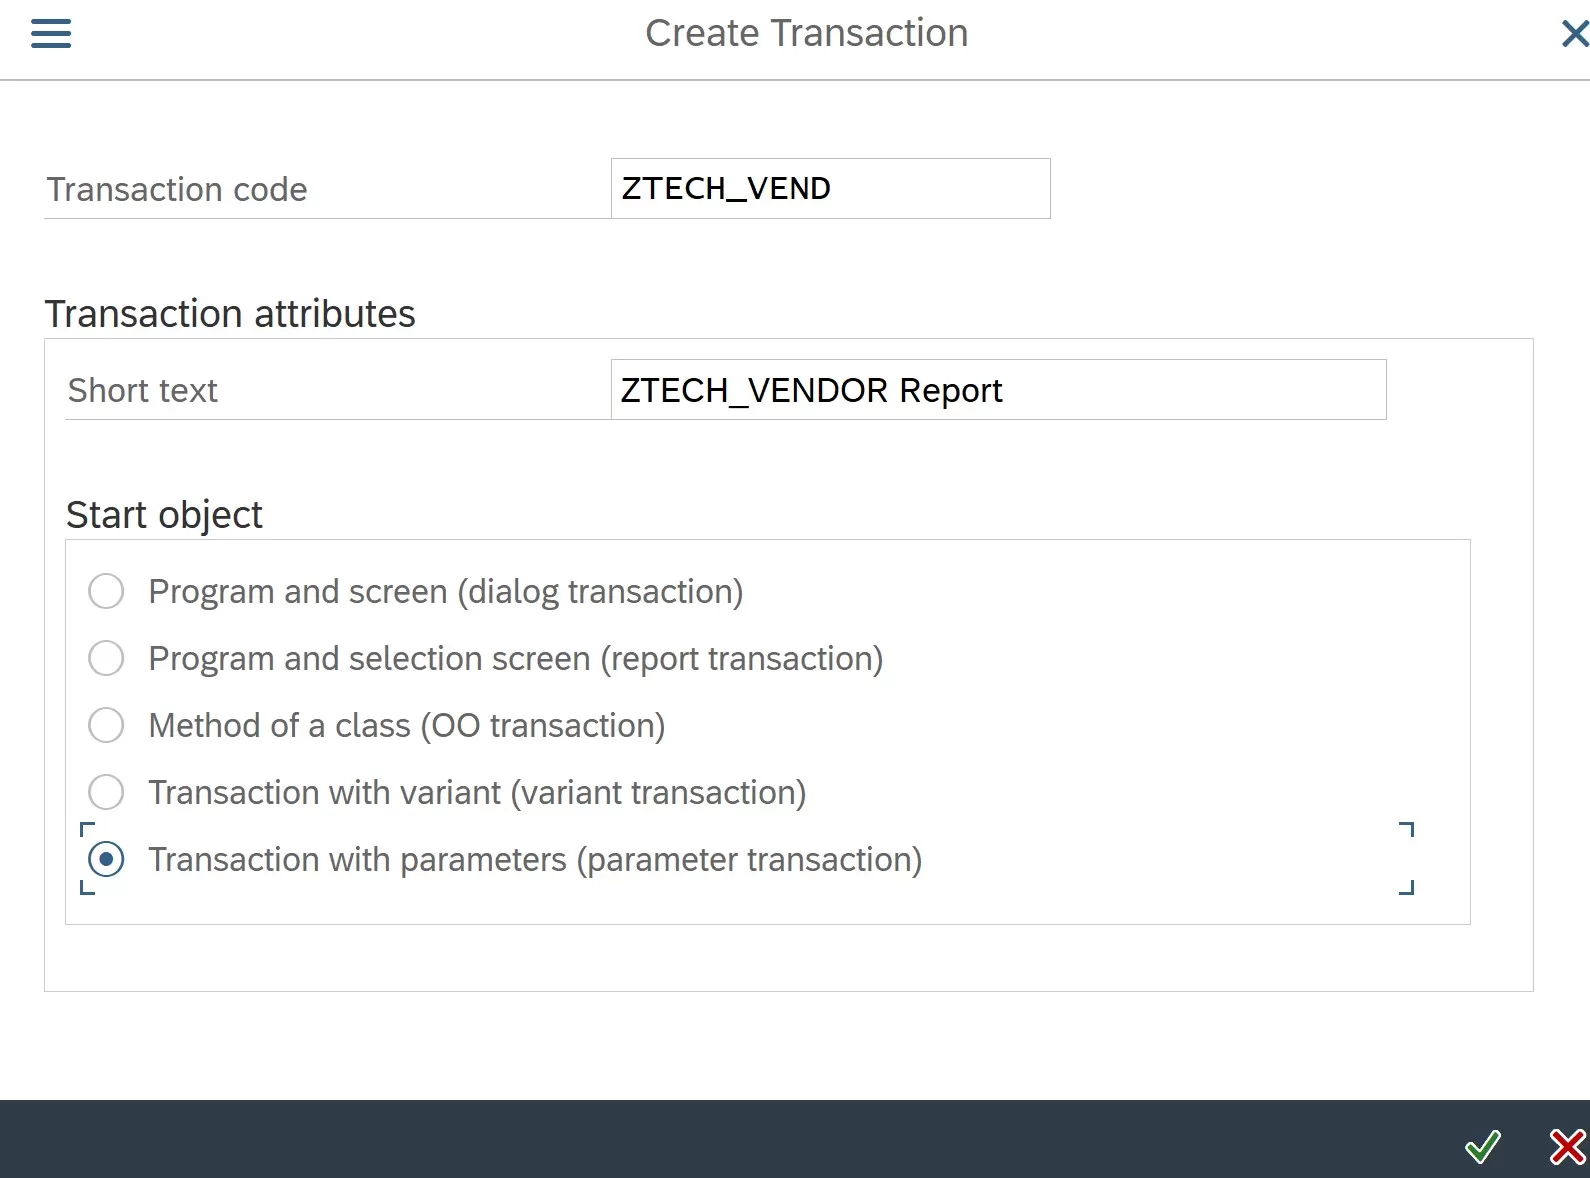
Enter the details as shown below
| Fields | Description | Values |
| Transaction | START_REPORT | |
| Default values as below | ||
| D_SREPOVARI-REPORTTYPE | AQ | |
| D_SREPOVARI-EXTDREPORT | Name of the Query | ZTECH_VENDOR |
| D_SREPOVARI-REPORT | User Group | ZTECH |
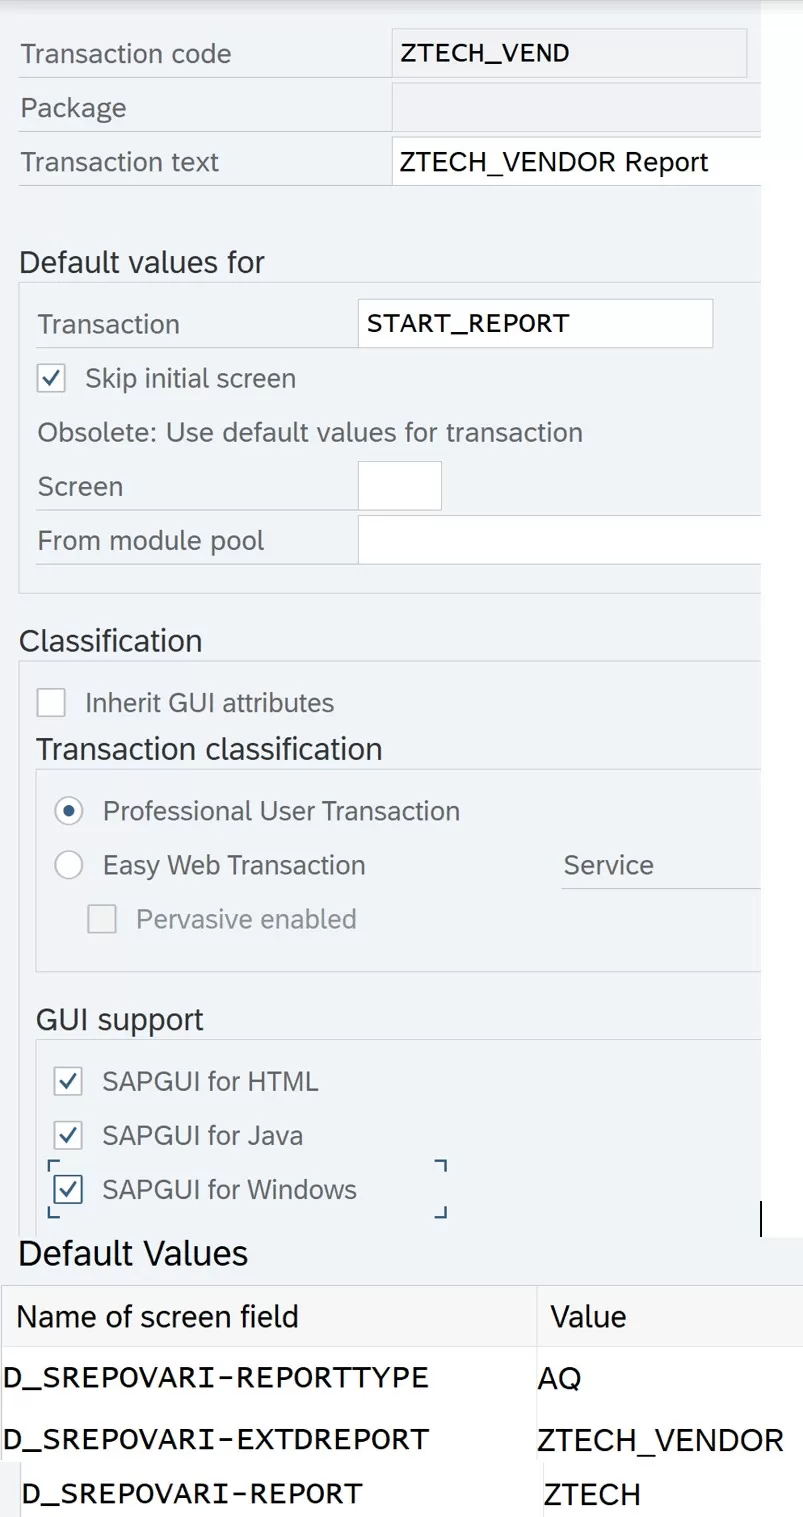
Click Save button. This will create transaction code for the above query. In this example transaction code ZTECH_VEND has been created for this query
This completes our discussion on SAP Queries
Pingback: SAP Finance Tutorials | AUMTECH Solutions-SAP Training
Pingback: SAP Technical | AUMTECH Solutions-SAP Training